
GTA V Story Part 11 · The War for Paleto Bay Bank
Chapters in this story
The Paleto Bay Bank heist, initiated by the FIB's coercive demands, escalates from a simple robbery into an all-out war against the military. Amidst the desperate process of arming themselves for survival and boarding a train for escape, the relationships and futures of the three men are tested once again.
Spoiler Notice: This is a 20-part detailed series explaining the GTA V single-player campaign from the prologue to the three endings. This is a narrative commentary based on in-game events and is not an official novel or script. Simultaneous missions and choice-based events may vary in chronological order. The heist approaches and endings A, B, and C are mutually exclusive alternatives, not consecutive events. Illustrations are AI-generated scene reconstructions referencing the game's characters and locations.
1. Paleto Score Setup · Big Money in a Small Bank
Michael De Santa and Trevor Philips meet FIB agents Steve Haines and Dave Norton in Trevor's meth lab above the liquor store in Sandy Shores. The agents order a raid on a research facility to prove that the IAA is manufacturing nerve gas for terrorism. When Michael objects to the FIB's coercive demand that they fund the necessary helicopter and equipment themselves, the agents ignore his protests, focusing only on destroying evidence before leaving.
To raise the funds, Michael contacts Lester Crest and heads to Paleto Bay. During the drive, Michael and Trevor engage in a heated argument about past betrayals and their current ways of life. Trevor expresses doubt about whether the wheelchair-bound Lester is suitable for a large-scale heist, but Lester explains that the small bank in Paleto Bay acts as a 'piggy bank' for local police corruption funds and drug cartel kickbacks.
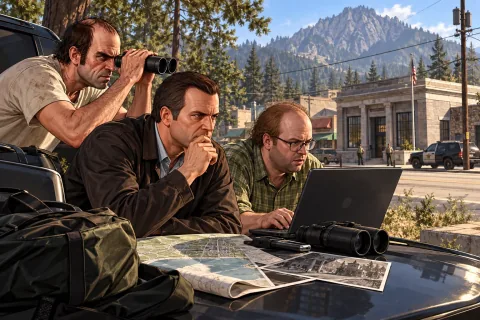
Upon arriving in Paleto Bay, the trio waits at a bus stop to inspect the bank's front and rear security systems. Lester assesses the security as outdated, but Trevor insists on checking it personally and gets out of the car. After Michael shoots the alarm on the back door to trigger it, the group moves to a gas station across the street to measure the police response time.
Just 67 seconds after the alarm sounds, four police cars surround the bank. Seeing such a massive force respond immediately despite no shots being fired, Lester analyzes that the local police are reacting with abnormal speed and violence to protect their dirty money. As the police set up roadblocks on the highway, Trevor steals a motorcycle and races Michael's car back to Sandy Shores.
Back at the hideout, the group formalizes the plan under Lester's leadership. While Michael is horrified to find a human eyelid in the mysterious food Trevor heated up from the fridge, Lester outlines the plan on a chalkboard. To break through the local police's fierce resistance, Lester suggests raiding a military convoy passing near Fort Zancudo to seize military-grade equipment.
He also sketches out a plan to have Franklin Clinton on standby to secure an escape route by sea. Michael reviews candidates to hire as gunmen for the operation, carefully selecting experts to share the cut. Lester leaves for a motel to prepare the equipment, while Michael and Trevor begin preparing their respective roles for the upcoming massive bank robbery.
2. Military Hardware · Bulletproof Gear and Firepower
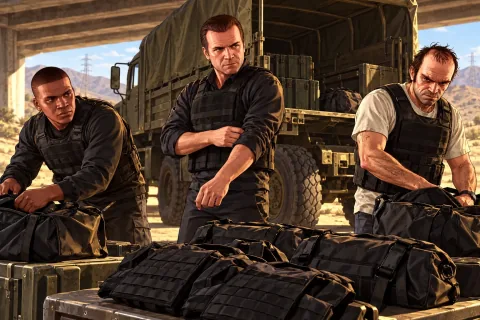
To rob the Paleto Bay bank, they needed overwhelming defensive capabilities and firepower to break through the swift and violent cordon of corrupt local police. Lester Crest receives intelligence that a regular army convoy heading to Fort Zancudo is transporting state-of-the-art heavy weapons and EOD-level heavy body armor. Michael De Santa or Trevor Philips is tasked with ambushing this convoy to seize the military equipment needed for the operation.
Moving to the operation area near Harmony, the protagonist controls the road and blocks the military convoy's path. The soldiers escorting the convoy immediately disembark and begin to resist fiercely, firing rifles. This was an organized and trained response from a regular military unit, a level above the sporadic skirmishes with Merryweather security mercenaries, but the protagonist suppresses all escort troops with precise fire using the terrain and cover.
After the intense firefight, the protagonist boards and takes the wheel of the Barracks, a large military truck loaded with bulletproof gear and heavy weapons. This bold act of seizing core assets from the regular military goes beyond a simple robbery, resulting in serious consequences by directly provoking the national armed forces. This becomes the decisive justification for the actual military and tanks to be deployed in large numbers at the Paleto Bay bank heist site later, rather than a private military company.
The protagonist drives the stolen Barracks truck quickly to the back of Trevor's liquor store in Sandy Shores. After parking the truck in a secure area behind a chain-link fence, they call Lester to report that the military equipment has been successfully secured. Lester confirms that all physical preparations for the operation are complete and calls the scattered group back to the hideout.
The equipment secured from the convoy consisted of thick military-grade body armor covering the body from head to toe and heavy weapons like the minigun with immense destructive power. This gear was the only means to ensure the trio's survival in the all-out war against the police and military that would unfold in Paleto Bay. Having finished all preparations as armed robbers, the group enters the final stage, checking their weapons and gear ahead of the looming massive battle.
3. The Paleto Score · Heavily Armed Robbers Hit the Streets
On the morning of the heist, Michael De Santa, Trevor Philips, Franklin Clinton, Lester Crest, and the hired gunman gather at Trevor's meth lab. Michael and Trevor argue again over the issue of kidnapping Martin Madrazo's wife, Patricia, but Franklin intervenes to stop the conversation. While Lester stays at the hideout to coordinate the operation, the other four head to Paleto Bay in a van, easing the tension by sharing stories of their first robberies.
Arriving in Paleto Bay, Michael drops off Franklin at the docks to support the sea escape. Afterward, Michael, Trevor, and the gunman put on masks and storm into the Blaine County Savings Bank. While Trevor fires his gun at the ceiling to trigger the alarm and threaten staff and customers, Michael and the gunman break into the vault to grab the cash. However, while they are filling the duffel bags, the bank is already completely surrounded by local police.
Police with megaphones demand surrender, but the three walk out of the bank armed from head to toe in military body armor and carrying miniguns. Armed with overwhelming firepower, they attempt to break through, turning police vehicles into Swiss cheese. They even shoot down a police helicopter that appears overhead, but Franklin radios in to report that the coast is also swarming with police, making an escape by boat impossible.
With the sea escape route blocked, the group smashes through residential fences and engages in urban warfare through backyards. As they push through the fierce cordon, which now includes NOOSE forces, cash spills out every time enemy bullets hit the duffel bags, reducing the stolen amount in real-time. To make matters worse, the situation reaches a breaking point as regular military troops and tanks are deployed to the scene in retaliation for the theft of military equipment.
In the desperate moment when 120mm tank shells are flying, life and death depend on the competence of the hired gunman. If an inexperienced gunman is chosen, he cannot withstand the concentrated fire from the police and military and dies on the scene, losing the duffel bag he was carrying. A skilled gunman survives to the end and helps the group establish a defensive line.
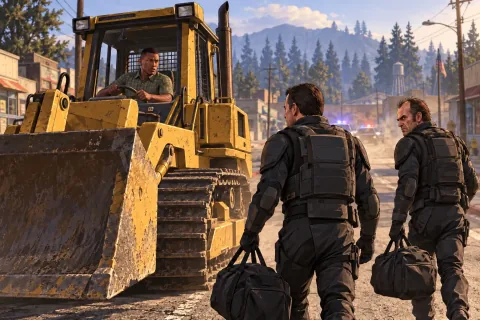
Michael urgently radios Franklin to find a sturdy vehicle and join them. Franklin steals a large bulldozer from a nearby construction site and charges through the soldiers' gunfire and tank shells to the group's isolated position. Michael and Trevor climb onto the massive shovel of the bulldozer driven by Franklin, barely escaping the first perimeter.
4. Bulldozer and Train · Diminished Spoils
Franklin Clinton narrowly avoids tank fire and drives the bulldozer toward a nearby chicken processing plant. Michael De Santa and Trevor Philips, hanging onto the bulldozer's shovel, enter the plant as soon as they arrive and establish a defensive line. Regular military troops were already lying in wait inside, and the three engage in an intense firefight, using narrow corridors and conveyor belts as cover.
Franklin, who is not wearing body armor, follows Michael's instructions to fall back and provide cover, while the heavily armored Michael and Trevor take the lead to suppress the soldiers and advance. Reaching the railway platform at the back of the plant, the group secures the tracks while fending off the relentless waves of military troops. As a freight train passes by at high speed, the three time their jump perfectly, throwing themselves into a cargo car and dramatically escaping the scene.
After escaping the wanted level on the train, the group disembarks near Sandy Shores. FIB agent Andreas Sanchez is waiting there in advance. Sanchez recovers the duffel bags the group risked their lives to steal and immediately deducts a massive amount under the guise of operation preparation costs and the FIB's share. With the money lost during the firefight and the FIB's cut taken out, the net profit the three actually get is far below expectations.
Sanchez informs them that Steve Haines will soon order the next target, the infiltration of the Humane Labs, and leaves in a van. It was a dangerous mission that would have resulted in total annihilation without Lester Crest's meticulous planning and Franklin's daring bulldozer rescue, but the reward went straight into the FIB's pockets. Michael cannot hide his frustration and suggests they all go their separate ways.
Trevor and Franklin leave together, and Michael remains alone on the tracks, preparing to return home. The war in Paleto Bay proved that they possess the firepower to go beyond simple bank robbery and stand against the regular military. At the same time, however, it clearly showed their predicament of being forced to be used under the FIB's control despite taking on immense risks.
The diminished spoils and coercive orders become the causal link that makes it painfully clear why they must escape the FIB's grip. Now, all that remains for them is to walk into an even deeper and more dangerous conspiracy called the Humane Labs, as demanded by the corrupt agents.
Missions covered in this part
Paleto Score Setup · Military Hardware · The Paleto Score
Data and Verification Scope
This was written based on the missions and character relationships in the GTA V single-player campaign. Rockstar Games is the official game introduction, and Grand Theft Wiki is the unofficial fan resource used to verify mission details. I have not turned optional actions or unreleased scenes into confirmed events, and I do not mix in stories from GTA Online or GTA VI. This text is not a direct translation of in-game dialogue or reference materials.
Rockstar Games · Official GTA V Game Introduction
Grand Theft Wiki · Paleto Score Setup
comments 0