
Diablo Chronicles Episode 9: The Hand Released in the Desert Tomb
Chapters in this story
- The Port of Lut Gholein and Deepening Anxiety
- Radament of the Sewers and the Horadric Clue
- The Journey to Lift the Desert's Curse
- The Arcane Sanctuary and the Vision of the True Tomb
- The Wanderer and Marius Reach Tal Rasha's Tomb
- Foolish Pity and the Release of the Lord of Destruction
- Duriel, the Lord of Pain, and the Imprisoned Archangel
- A New Pursuit Toward the Eastern Jungles
- Verified Sources
This is a fan narrative rewritten based on the events of the original game. The characters' emotions, dialogue, and scene atmospheres have been reconstructed, and it contains major spoilers.
The Port of Lut Gholein and Deepening Anxiety
Warriv's caravan pushed through the endless sandstorms and finally arrived beneath the massive stone walls of Lut Gholein. This port city, once celebrated as the Jewel of the Desert, had completely lost its former vitality, draped instead in a heavy, suffocating silence. As the hero stepped down from the wagon, the scent of blood, rather than the salty sea breeze, brushed against their nose.
Greiz, the mercenary captain guarding the city gates, gripped his spear with white-knuckled intensity. Deep fatigue clung to his eyes as if he had not slept for days, and in a raspy voice, he lamented that his people were dying because of monsters crawling out of the sewers. The hero nodded silently, facing his despair.
In a corner of the plaza, the old scholar Deckard Cain studied ancient texts with a grim expression. Though he welcomed the hero who had defeated Andariel and journeyed east, Cain's voice carried a palpable dread of an even greater impending catastrophe. He shared the ominous news that the Dark Wanderer had headed somewhere into this vast desert.
The mage Drognan stood with crossed arms, keenly analyzing the energy enveloping the city. He surmised that the Wanderer was not merely passing through, but was searching for Baal, the Lord of Destruction, whom the Horadrim had sealed away long ago. Only by finding his resting place, the Tomb of Tal Rasha, could they prevent this horrific disaster.
According to Drognan, Tal Rasha had sacrificed his own body to contain Baal's Soulstone, waging an eternal struggle within. However, the location of the tomb was strictly hidden, and only the Horadric Staff could open the way. The hero gripped the hilt of their sword, feeling the immense weight of the burden they had to carry.
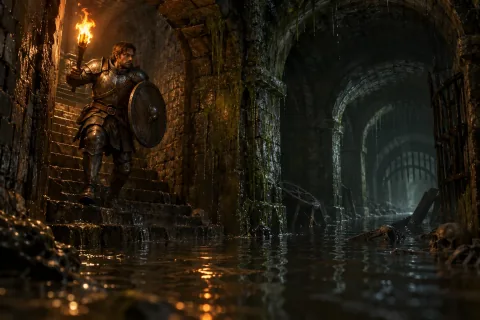
Greiz pleaded that before searching for the tomb, the hero must first slay the monster in the sewers that was choking the life out of the city. With horrific screams echoing every night, even his mercenaries were losing morale and deserting. Without hesitation, the hero threw open the iron grate leading to the sewers and stepped into the deep, damp darkness.
As they descended deeper underground, the stench grew thicker, and even the torchlight dimmed against the permeating miasma. Vivid bloodstains of the victims remained on the walls, hinting at the carnage that had unfolded there. Raising their shield high, the hero advanced cautiously, focusing all their senses on the sound of rattling bones echoing from all directions.
At the end of the damp corridor, a massive shadow casting bizarre incantations flickered. Radament, a creature in the form of an ancient mummy, was endlessly resurrecting the dead and spewing toxic fumes toward the hero. The inevitable battle with the culprit who had plagued the Jewel of the Desert finally began in the cramped, dark subterranean space.
Radament of the Sewers and the Horadric Clue
The deadly poison spewing from Radament's mouth was lethal enough to choke the breath out of anyone upon contact. The hero rolled quickly to evade the toxic cloud, then deflected the sword strikes of the resurrected skeletons with their shield. The mummy's red eyes, gleaming in the darkness, burned with a murderous intent that seemed to loathe all living things.
Even when the resurrected corpses were cut down, a wave of Radament's hand caused the shattered bones to knit back together and rise again. To avoid a meaningless war of attrition, the hero slipped through the gaps between the monsters and charged straight for the leader. As the sharp blade tore through the rotten bandages, Radament shrieked bizarrely and staggered.
Mortally wounded, Radament thrashed in agony, unleashing a final burst of poison that spread in all directions. Holding their breath, the hero drove their sword down with all their might, and the massive mummy finally collapsed to the floor with the sound of crushing bones. The undead horde guarding him, now leaderless, instantly crumbled into ash and scattered.
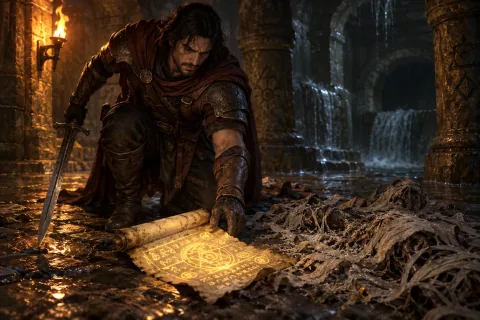
Where Radament fell, an ancient parchment scroll lay on the ground. Though stained with blood and filth, the ancient symbols drawn on its surface were unmistakably Horadric. The hero carefully picked up the scroll and examined its contents near the torchlight, intuitively sensing that this was the clue to finding the tomb.
Upon returning to the surface, the hero was greeted first by Greiz's bright smile, filled with relief. The mercenary captain sealed the tightly shut sewer entrance and praised the hero's achievement. The citizens of Lut Gholein were finally freed from the terror of the night, enjoying a brief respite as life slowly returned to the streets.
Deckard Cain took the scroll brought by the hero and began to decipher the characters with trembling hands. Deep furrows creased his wrinkled brow, and he soon revealed that the scroll contained the method for crafting the Horadric Staff. The wooden shaft and the metal headpiece of the staff were hidden separately across the desert.
Cain explained that the shaft was sealed deep within the Maggot Lair, while the headpiece was hidden in the Claw Viper Temple. Only by finding these two pieces and fusing them within the Horadric Cube could the complete staff be forged to open Tal Rasha's Tomb. Looking out over the endless sand dunes, the hero braced themselves for the arduous journey ahead.
Drognan handed the hero a potion of magical protection as they prepared to venture into the desert, offering a warning. He said that hellish demons were already swarming in the wake of the Wanderer, and not even sunlight could pierce their wicked magic. Packing their gear tightly, the hero stepped out into the endless desert under the scorching sun.
The Journey to Lift the Desert's Curse
Crossing the arid hills, the hero arrived at the Maggot Lair, which had turned into a breeding ground for a horrific swarm of insects. Giant sand maggots sprayed slime, packing the narrow tunnels, and an unpleasant squelching sound echoed with every step. Wielding their torch to drive the bugs away, the hero descended carefully into the depths of the earth.
At the lowest level of the lair, a maggot queen as massive as a mountain lay coiled. As venomous spines shot out in all directions, the hero held their shield close, slipped into her blind spot, and pierced her vital point. Behind the fallen queen, whose body ruptured with sticky fluids, the hero finally found the wooden shaft of the Horadric Staff.
Upon emerging with the shaft, the hero saw that the desert sky had bizarrely stained a blood-red darkness. Despite it being broad daylight, the sun had lost its luster, and a chilling cold seeped through the howling sandstorms. Realizing this was a curse cast by the Claw Vipers, the hero hurried toward the Claw Viper Temple beyond the Lost City, the source of the darkness.
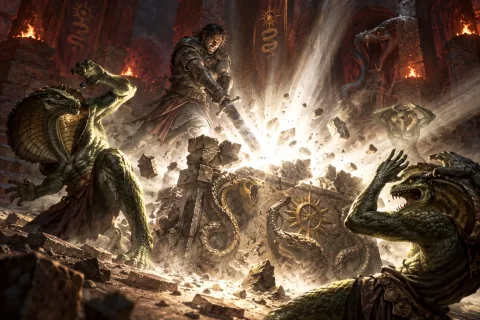
The interior of the temple swarmed with reptilian monsters covered in cold, slippery scales. Serpent-headed humanoids brandished sharp spears to surround the hero, lunging from all sides with flashing, venomous fangs. Swinging their sword in wide arcs to break the encirclement, the hero relentlessly fought a bloody battle toward the central altar.
Upon the dais stood the massive Altar of the Sun, radiating an ominous energy. After slaying the serpent leader circling it, the hero struck the altar with their sword without hesitation, shattering it to pieces. As the altar broke with a metallic crash, the sealed metal headpiece of the Horadric Staff revealed itself within.
The moment the altar was destroyed, the blood-red darkness weighing down on the desert began to vanish as if washed away. Intense sunlight poured through the clouds once more, warmly embracing the lands of Lut Gholein. Tucking the serpent-shaped metal headpiece into their vest, the hero exhaled deeply, filled with a sense of accomplishment at having finally gathered both pieces of the staff.
Returning to the city, the hero carefully placed the wooden shaft and the metal headpiece inside the Horadric Cube. As they chanted the ancient incantation taught by Cain, a blinding light erupted from the Cube, fusing the two pieces into one. It was a wondrous moment—the complete Horadric Staff, capable of opening Tal Rasha's Tomb, was finally finished.
Yet, even with the staff in hand, the location of the true Tomb of Tal Rasha remained a mystery. Drognan advised that the answer could only be found by traveling to the Arcane Sanctuary through a portal opened in the palace cellar. Strapping the completed staff firmly to their back, the hero headed into the deep darkness of the palace cellar opened by King Jerhyn.
The Arcane Sanctuary and the Vision of the True Tomb
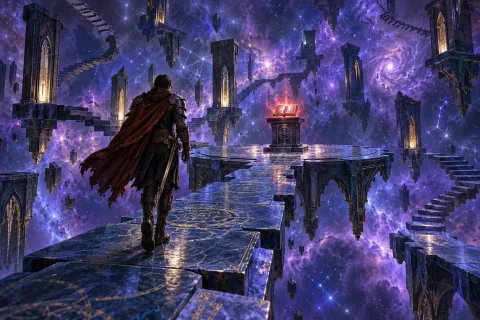
Following the trail of blood down into the palace cellar, the hero finally stepped into the Arcane Sanctuary, a bizarre space of impossible geometry. Stone pathways suspended in the void and upside-down pillars completely defied the laws of physics. Enveloped in a strange sensation of walking through the cosmic abyss, the hero began to wander the labyrinth in search of clues to the tomb.
At every turn of the sanctuary's pathways, fire-breathing Ghoul Lords and lightning-casting Wraiths lay in wait. Deflecting magical attacks from the void with their shield, the hero crossed the precarious stone paths, cutting down enemies. A dizzying battle continued, where a single misstep could plunge them into the endless abyss.
At the end of the labyrinth, where four paths intersected, stood a mad Summoner. He was once Jazreth, a mage from Tristram, but had now degenerated into a monster commanding demons, intoxicated by corrupted magic. Jazreth burst into a bizarre laugh and hurled destructive fireballs at the hero.
As flames swept across the stone path, the hero hid behind a pillar, tracking the trajectory of the fireballs. In the split second Jazreth paused to catch his breath for the next spell, the hero lunged forward. As the sharp sword pierced the Summoner's chest, his laughter turned into a horrific death rattle and dissolved into the air.
Behind where Jazreth fell, Horazon's Journal floated in the air, radiating a crimson glow. As the hero carefully placed their hand on the journal, the symbols of seven ancient tombs rushed chaotically into their mind. Six of them were false illusions; only one symbol pointed to the true Tomb of Tal Rasha.
As the journal's magic was unleashed, the symbol of the true tomb was vividly etched into the hero's mind. Simultaneously, the space of the sanctuary warped, and a massive red portal leading to the Canyon of the Magi yawned open. Wiping the sweat from their brow, the hero adjusted their grip on the Horadric Staff and threw themselves into the portal, heading toward the edge of the desert where Baal was imprisoned.
Upon arriving at the Canyon of the Magi, a biting sandstorm immediately obscured the hero's vision. Seven tomb entrances gaped along the massive rock walls, each engraved with the symbols seen in Horazon's Journal. Recalling the true symbol from memory, the hero fought through hordes of demons to find the correct tomb.
Standing at last before the entrance of Tal Rasha's Tomb engraved with the true symbol, the hero felt a thick aura of darkness. From deep within the tomb, a sound resembling either a beast's howl or a painful groan echoed continuously. Gripping the staff tightly, the hero opened the sealed door that had been shut for a thousand years and stepped into the darkness with firm resolve.
The Wanderer and Marius Reach Tal Rasha's Tomb
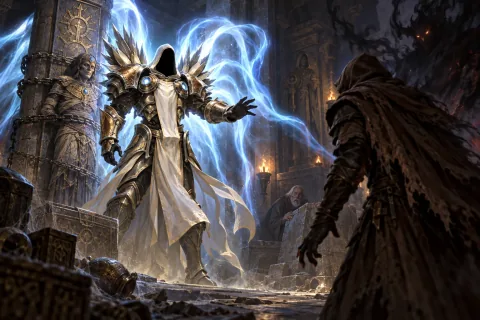
While the hero was wandering the Arcane Sanctuary, the Dark Wanderer and the old man Marius had already reached the depths of the Canyon of the Magi. The Wanderer's steps grew heavier by the moment, and a demonic silhouette overlapped with his body amidst a shroud of crimson smoke. Trembling with fear, Marius followed closely behind, drawn by an inexplicable force.
As the Wanderer approached the entrance of the true Tomb of Tal Rasha, the tightly shut stone doors parted on their own to grant passage. The interior of the tomb was cold and dry, defying the passage of a thousand years, and ancient Horadric runes glowed faintly on the walls. Holding his breath, Marius swallowed hard as he stared at the Wanderer's hunched back.
Passing through the labyrinthine corridors into the deepest chamber of the seal, the figure of a man bound to a massive pillar by heavy chains was revealed. He was none other than the great mage Tal Rasha, who had sacrificed his own body to seal the Lord of Destruction. Deeply embedded in his chest was Baal's amber-glowing Soulstone, and his flesh was horribly withered and dried.
The moment the Wanderer approached Tal Rasha, a blinding light erupted from the void, and the Archangel Tyrael descended. Tyrael's blue wings illuminated the chamber, and he blocked the Wanderer's path with a resolute voice. Consumed by Diablo's essence, the Wanderer let out a horrific shriek and lunged fiercely at Tyrael.
The clash between the Archangel and the demon shook the entire tomb violently, as if an earthquake had struck. Every time the sword of light collided with dark magic, a deafening crack echoed, and Marius, paralyzed with fear, huddled in a corner and covered his ears. Tyrael overwhelmed the Wanderer, pinning him against the wall, and victory seemed imminent.
But at that moment, the chained Tal Rasha let out a painful groan and turned his head toward Marius. His eyes, consumed by Baal's soul, held a pitiful light, and an auditory hallucination seemed to slip through his cracked lips, begging to be freed from this torment. A tempest of profound pity and confusion swirled within Marius's heart.
While Tyrael focused all his attention on subduing the Wanderer, Marius approached Tal Rasha as if possessed. A blind urge to help the man writhing in horrific agony paralyzed his reason. Marius's trembling hand slowly reached toward the amber Soulstone embedded in Tal Rasha's chest.
The cold touch of the Soulstone met Marius's fingertips. Meeting Tal Rasha's pleading gaze, he pulled the Soulstone out with sudden force, as if spellbound. In that instant, the air in the chamber froze, and a tearing, demonic laughter erupted from Tal Rasha's mouth as the thousand-year seal shattered in vain.
Foolish Pity and the Release of the Lord of Destruction
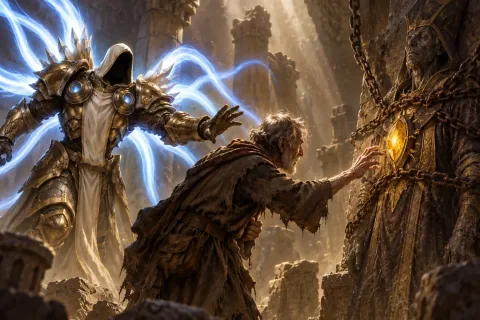
With the Soulstone removed, Tal Rasha's body instantly began to warp into the form of Baal, the Lord of Destruction. The broken chains clattered to the floor, and the horrific magic of the freed demon swept through the tomb. Marius stumbled backward as he realized what he had done, but the Soulstone in his hand had already ensnared his destiny.
Realizing the situation too late, Tyrael let out a desperate cry and swung his great sword of light at Baal. However, as the Wanderer, harboring Diablo's essence, and the fully liberated Baal pressured the Archangel simultaneously, the tide of battle turned in an instant. Tyrael's blue wings broke under the demons' pincer attack, gradually losing their light.
Baal extended bizarre tentacles to bind Tyrael's limbs, pinning him against the central pillar of the chamber. The Wanderer nodded in satisfaction, radiating an aura that seemed to celebrate the reunion with his brother. Even in his agony, Tyrael desperately turned his head to look at Marius, who was completely frozen in terror.
The Archangel commanded Marius with a voice that felt like spitting blood. It was a desperate and resolute cry to take the Soulstone, travel east past Kurast, and go to the Hellforge to destroy it. Marius shook his head, his face stained with tears, but he could not escape the intense gaze of Tyrael's unyielding will.
As Baal prepared to unleash his murderous intent upon Marius, Tyrael squeezed out his remaining power of light to draw the demons' attention back to himself. Seizing that split second, Marius clutched the Soulstone to his chest and ran frantically toward the tomb's exit. The angel's screams and the demons' laughter echoing behind him tore at his ears.
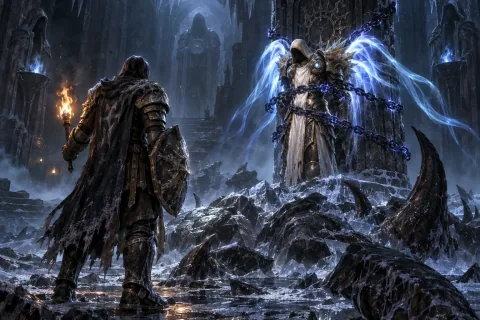
Immediately after Marius escaped, Baal and the Wanderer cast a barrier to imprison the Archangel in the depths of the tomb. They prepared to depart for the eastern jungles where their eldest brother, Mephisto, was imprisoned, to achieve their ultimate goal. The prison that had bound Baal for a thousand years had now turned into a pit of despair ensnaring Tyrael.
In the wake of the two Prime Evils, Duriel, the Lord of Pain, remained to guard the tomb. Duriel, possessing the form of a massive insect, clashed his sharp, scythe-like forelegs and exhaled a horrific chill. He quietly held his breath in the darkness of the chamber, waiting to tear apart any human hero who might arrive late to the tomb.
Fleeing into the desert sandstorms, Marius endlessly cursed his own foolishness. The amber Soulstone in his hand pulsed ominously, like a living heart. Repeating Tyrael's final command to himself, he embarked on the perilous journey eastward to redeem the horrific mistake he had made.
Duriel, the Lord of Pain, and the Imprisoned Archangel
As the hero inserted the Horadric Staff into the orifice, a massive rumble shook the chamber, and the wall leading to the inner sanctum crumbled. The space they entered through the cloud of dust was dreadfully cold, and there was no trace of Baal. Instead, the hero was greeted by Duriel, the Lord of Pain, twisting his massive body as he approached.
The freezing aura exhaled by Duriel made even breathing painful. The hero's steps froze in the chill, slowing down noticeably, and seizing the moment, Duriel's massive scythe sliced through the air. The hero barely managed to raise their shield to block the attack, but the immense impact sent them flying backward to roll across the floor.
Within the cramped chamber, there was virtually no room to evade Duriel's charges. Forcing their frozen body to move, the hero darted between the pillars to disperse the enemy's attacks. Every time Duriel struck the ground in fury, massive boulders rained down from the ceiling, and the battle escalated into a desperate struggle with an unpredictable end.
As their senses grew numb, consumed by the cold, the hero drank a Thawing Potion they had kept in their vest. As warmth surged through their frozen veins, their stiffened body grew light once more. Watching for the moment Duriel raised his forelegs high, the hero drove their sword deep into the soft joint between his thick carapace plates.
The Lord of Pain shrieked bizarrely and thrashed, but the hero did not let go of the sword, throwing their weight to tear the wound even deeper. Drenched in the foul fluids spewing from the beast, the hero did not stop, landing consecutive critical blows. Finally, Duriel's massive body collapsed, and the floor of the chamber sank with a heavy tremor.
With Duriel dead and the terrible chill lifted, a faint light seeped from the inner depths of the tomb. As the hero cautiously entered the inner chamber, the pitiful sight of the Archangel Tyrael, suspended in midair and trapped within a barrier, was revealed. His blue wings were torn, and his holy armor was brutally shattered by the demons' attacks.
As the hero approached and shattered the barrier, Tyrael descended to the floor with a heavy sigh. Though he paid homage to the human hero for defeating the Lord of Pain, his face was grim as he lamented that they had arrived too late. He delivered the shocking news that Baal had already broken his thousand-year seal and was freed, thanks to the foolish pity of a mortal.
The hero clenched their fists at the horrific failure that had occurred while they were searching for the staff. Despite defeating Andariel and crossing the desert, a sense of self-reproach washed over them for failing to prevent the demon's release. However, Tyrael encouraged the hero, saying there was no time for despair, and that hope remained as long as Marius, who held the Soulstone, was still alive.
A New Pursuit Toward the Eastern Jungles
Tyrael explained that Diablo and Baal had headed toward Kurast in the east to free their eldest brother, Mephisto, the Lord of Hatred. If the three Prime Evils were to unite, a catastrophe that neither Sanctuary nor the High Heavens could withstand would surely unfold. The Archangel's voice carried an unprecedented urgency and deep concern.
Taking Tyrael's warning to heart, the hero sharpened their chipped blade and tightened the straps of their shield. Etching the painful failure of their futile pursuit in the desert deep into their heart, they vowed that this time, they would halt the demons' advance. Bestowing a blessing of light upon the hero, Tyrael urged them to return quickly to Lut Gholein.
Emerging from the tomb and returning to the city, the hero was met by King Jerhyn and Deckard Cain. Upon hearing the news of Baal's release from the hero, Cain let out a deep sigh and hung his head. However, quickly composing himself, the old scholar warned that the Zakarum Church in Kurast might already be tainted by Mephisto's corruption, urging swift preparations.
King Jerhyn expressed his deep gratitude for the hero's devotion and promised to secure Meshif's ship so they could sail east. Although the Jewel of the Desert had escaped the darkness thanks to the hero, the fate of the world now rested on the jungle lands across the sea. The citizens sent silent prayers of support toward the hero's retreating figure as they headed to the docks.
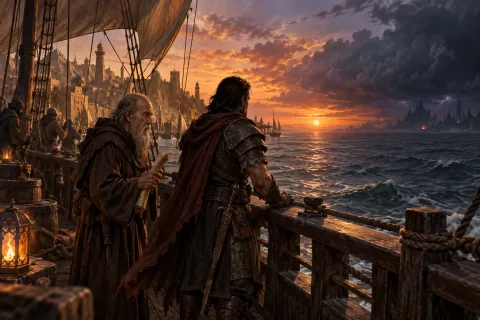
Captain Meshif, anchored at the port, had already raised the sails and completed preparations for departure. Taking the hero and Cain aboard, he set sail across the treacherous Twin Seas toward the eastern continent. The salty sea breeze brushed against the hero's cheeks as the receding skyline of Lut Gholein was bathed in the crimson glow of the setting sun.
Standing on the ship's deck, the hero stared at the dark clouds gathering thick over the horizon. Out there lay the Wanderer, the freed Baal, and the old man Marius, who would be fleeing under the crushing weight of the Soulstone. In the hero's heart, instead of the chilling terror left by Duriel, a burning resolve to destroy the Prime Evils blazed.
On one side of the deck, Cain unrolled an old parchment and began studying the geography of Kurast's jungles and Travincal. He warned of how insidiously Mephisto's hatred could seep into the human mind, advising that the upcoming battle would be a trial that gnaws at the spirit as well as the flesh. The hero nodded silently.
Carried by the wind filling the sails, the ship cut through the black waves, heading east. The hand of destruction released from the desert tomb was already reaching into the heart of the jungle, but the pursuer's resolve would never falter. Toward the bloody land of hatred that lay ahead, the hero stared out at the darkened sea with steadfast eyes.
Verified Sources
Official Blizzard Chronicle: The Tragedy of Tristram
Official Quest Data: Diablo II Act I
Official Quest Data: Diablo II Act II
Official Quest Data: Diablo II Act III
Official Quest Data: Diablo II Act IV
comments 0