
How to Make a Terraria Mod: Add Items and Crafting Recipes with tModLoader
Based on the Terraria tModLoader 1.4.4 stable development flow, we will create a practice token made from 10 wood. You will learn the roles of C# ModItem, PNG textures, and CreateRecipe. Prepare a separate environment for running vanilla Terraria versus your tModLoader modded worlds and characters.
1. Preparation and Version Check
Install official Terraria and original tModLoader, running them on the same stable branch. Check the developer wiki's Basic Prerequisites and .NET SDK requirements. Current basic instructions use the .NET 8.0 SDK, and the Desktop Runtime alone does not replace development tools. Do not mix outdated 1.3 example item fields or ModRecipe into modern code. Backup your characters, worlds, and existing mods before creating a new test character.
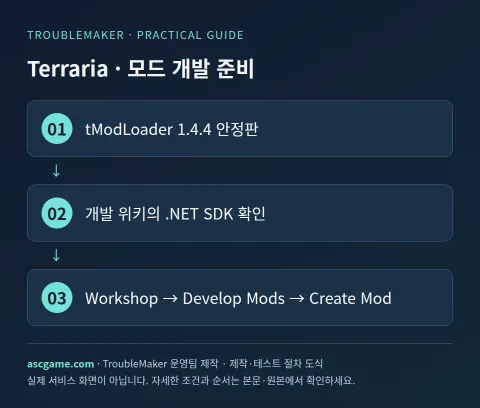
2. Creating a Mod Skeleton in the Game
- In the tModLoader main menu, select Workshop → Develop Mods → Create Mod.
- Use a unique internal ModName without spaces, such as TroubleMakerToken.
- Enter the display name, author, and default item name. The example default item name is set to WorkshopToken.
- After creation, open the actual ModSources folder via Open Sources in Develop Mods.
- Open the generated .csproj in the TroubleMakerToken folder in your IDE and wait for necessary dependencies to load.
- Initially, run Build + Reload once with the generator's original state to verify your development environment.
3. Modifying the Item Class
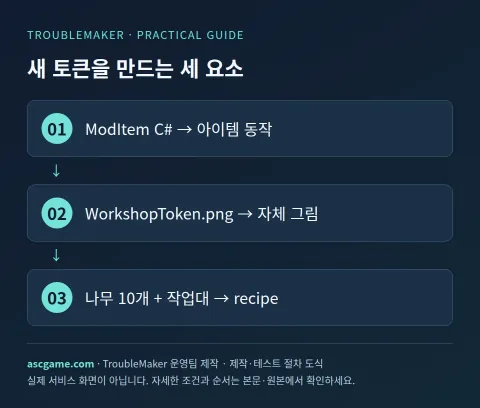
Replace Content/Items/WorkshopToken.cs with the structure below. If the generator used a different path or namespace, match those names and ensure two identical classes are not created. ModItem defines the new item's behavior, and SetDefaults sets the size, maximum stack, rarity, and more.
using Terraria;
using Terraria.ID;
using Terraria.ModLoader;

namespace TroubleMakerToken.Content.Items;

public class WorkshopToken : ModItem
{
    public override void SetDefaults()
    {
        Item.width = 20;
        Item.height = 20;
        Item.maxStack = 9999;
        Item.value = Item.buyPrice(silver: 1);
        Item.rare = ItemRarityID.White;
    }

    public override void AddRecipes()
    {
        CreateRecipe()
            .AddIngredient(ItemID.Wood, 10)
            .AddTile(TileID.WorkBenches)
            .Register();
    }
}
4. Adding PNG and Display Text
Place WorkshopToken.png in the same Content/Items folder. Modify the practice image included with the generator or use a transparent background PNG you drew yourself. The filename case and path must match the class name. 20×20 is the item collision and display setting, which does not necessarily mean every dimension of the original artwork must be those exact numbers. Starting your first example with a small square image makes alignment verification easy.
TroubleMakerToken/
  TroubleMakerToken.cs
  Content/Items/WorkshopToken.cs
  Content/Items/WorkshopToken.png
  Localization/en-US_Mods.TroubleMakerToken.hjson
Modern tModLoader manages display names and descriptions in HJSON localization. Insert the Items entry below into the generated Localization file or modify existing keys. Do not duplicate the same Mods root in the entire file; edit based on the generator structure.
Mods: {
  TroubleMakerToken: {
    Items: {
      WorkshopToken: {
        DisplayName: Workshop Token
        Tooltip: A token for learning how to create a mod.
      }
    }
  }
}
5. Building and Crafting In-Game
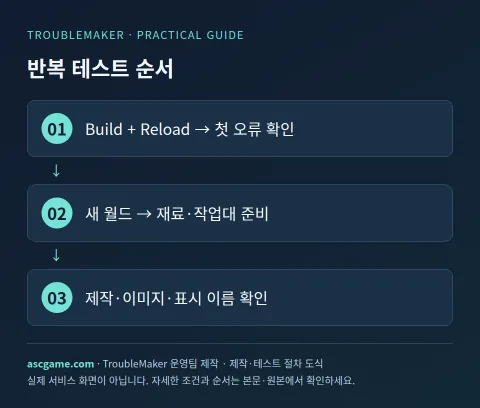
- Save your modified code and run Build + Reload in Develop Mods.
- If an error occurs, check the filename and line number of the first compilation error.
- Verify that your mod is enabled in the mod list and enter a new test world.
- Prepare 10 wood and a Work Bench, then open the crafting menu near the Work Bench.
- Craft the Workshop Token and check wood consumption, item stack, name, and description.
- If the texture is not visible, check the actual path and letter casing of the PNG and run Build + Reload again.
6. Most Common Failures and Troubleshooting
If the recipe does not appear, check whether you are near a work bench and correctly entered ItemID.Wood and TileID.WorkBenches. If you changed the namespace, clean up duplicate generated classes and match the image path accordingly. Disabling the mod will load saves without mod items, so do not apply this directly to actual gameplay saves. Exit the game, disable the mod, and compare using a separate backed-up test world.
7. Check before Workshop Sharing
Explain duplicate internal ModNames, stable version, crafting materials and work bench requirements, and the source of the original artwork. Since tModLoader's Publish function is a public upload, organize the distribution ZIP, README, and test results before using it. This guide explains the creation process and does not automatically upload to readers' accounts. When modifying and sharing other people's game assets or item mods, follow the original creator's permission and conditions.
Original Documents and Verification Criteria
Introductory guide written by the TroubleMaker operations team, verified against creator and official tool documentation on October 7, 2026. Code and diagrams are custom examples for explanation purposes and do not represent verified actual gameplay of the game on this server. Verify and distribute using a separate test save with the versions specified in the text. Compare the latest tool versions and dependencies from the original sources below:
Gemini machine translation · Original text and source region are preserved.
Original language · ko
테라리아 모드 만드는 법: tModLoader로 아이템과 제작 레시피 추가
Terraria tModLoader의 1.4.4 안정판 개발 흐름을 기준으로 나무 10개로 만드는 연습용 토큰을 만듭니다. C# ModItem, PNG 텍스처와 CreateRecipe의 역할을 배웁니다. Terraria 본체만 실행하는 환경과 tModLoader의 모드 세계·캐릭터는 구분해서 준비하세요.
[1. 준비와 버전 확인]
정품 Terraria와 원본 tModLoader를 설치하고 같은 안정판 브랜치로 실행합니다. 개발자 위키의 Basic Prerequisites와 .NET SDK 요구 사항을 확인하세요. 현재 기본 안내는 .NET 8.0 SDK를 사용하며 Desktop Runtime만으로 개발 도구를 대신하지 않습니다. 오래된 1.3 예제의 item 필드나 ModRecipe를 최신 코드에 섞지 않습니다. 캐릭터·월드와 기존 모드를 백업한 뒤 새 테스트 캐릭터를 만듭니다.
[image:conditions]
[2. 게임 안에서 모드 뼈대 만들기]
1. tModLoader 메인 메뉴에서 Workshop → Develop Mods → Create Mod를 선택합니다.
2. 내부 ModName은 TroubleMakerToken처럼 공백 없는 고유 이름을 사용합니다.
3. 표시 이름과 작성자, 기본 아이템 이름을 입력합니다. 예제 기본 아이템 이름은 WorkshopToken으로 정합니다.
4. 생성 후 Develop Mods에서 Open Sources로 실제 ModSources 폴더를 엽니다.
5. TroubleMakerToken 폴더의 생성된 .csproj를 IDE에서 열고 필요한 의존성 가져오기를 기다립니다.
6. 처음에는 생성기 원본 상태로 Build + Reload를 한 번 실행해 개발 환경부터 확인합니다.
[3. 아이템 클래스를 수정하기]
Content/Items/WorkshopToken.cs를 아래 구조로 바꿉니다. 생성기가 다른 경로·namespace를 사용했다면 그 이름을 맞추고 같은 클래스가 두 개 생기지 않게 합니다. ModItem은 새 아이템의 동작을 정의하며 SetDefaults는 크기·최대 스택·희귀도 등을 설정합니다.
```csharp
using Terraria;
using Terraria.ID;
using Terraria.ModLoader;
namespace TroubleMakerToken.Content.Items;
public class WorkshopToken : ModItem
{
public override void SetDefaults()
{
Item.width = 20;
Item.height = 20;
Item.maxStack = 9999;
Item.value = Item.buyPrice(silver: 1);
Item.rare = ItemRarityID.White;
}
public override void AddRecipes()
{
CreateRecipe()
.AddIngredient(ItemID.Wood, 10)
.AddTile(TileID.WorkBenches)
.Register();
}
}
```
[4. PNG와 표시 문구 넣기]
같은 Content/Items 폴더에 WorkshopToken.png를 둡니다. 생성기에 포함된 연습용 이미지를 수정하거나 본인이 그린 투명 배경 PNG를 사용하세요. 파일명 대소문자와 경로가 클래스 이름과 맞아야 합니다. 20×20은 아이템 충돌·표시 설정이며 반드시 원본 그림의 모든 치수가 그 숫자여야 한다는 뜻은 아닙니다. 첫 예제는 작은 정사각형 그림으로 시작하면 정렬 확인이 쉽습니다.
```text
TroubleMakerToken/
TroubleMakerToken.cs
Content/Items/WorkshopToken.cs
Content/Items/WorkshopToken.png
Localization/en-US_Mods.TroubleMakerToken.hjson
```
현대 tModLoader는 표시 이름·설명을 HJSON localization에서 관리합니다. 생성된 Localization 파일에 아래 Items 항목을 넣거나 이미 있는 키를 수정합니다. 전체 파일에 같은 Mods 루트를 중복으로 넣지 말고 생성기 구조를 기준으로 편집하세요.
```text
Mods: {
TroubleMakerToken: {
Items: {
WorkshopToken: {
DisplayName: Workshop Token
Tooltip: A token for learning how to create a mod.
}
}
}
}
```
[image:request]
[5. 빌드하고 실제 제작해 보기]
1. 변경한 코드를 저장하고 Develop Mods의 Build + Reload를 실행합니다.
2. 오류가 나면 첫 컴파일 오류의 파일명과 줄 번호부터 확인합니다.
3. 모드 목록에서 자신의 모드가 켜졌는지 확인하고 새 테스트 월드로 들어갑니다.
4. 나무 10개와 작업대(Work Bench)를 준비하고 작업대 옆에서 제작 메뉴를 엽니다.
5. Workshop Token을 제작해 나무 소비량·아이템 스택·이름·설명을 확인합니다.
6. 텍스처가 안 보이면 PNG의 실제 경로와 대소문자를 확인하고 다시 Build + Reload합니다.
[6. 가장 흔한 실패와 해제]
recipe가 안 보이면 작업대 근처인지, ItemID.Wood와 TileID.WorkBenches를 제대로 입력했는지 확인합니다. namespace를 바꿨으면 중복 생성 클래스를 정리하고 이미지 경로도 함께 맞춥니다. 모드를 끄면 모드 아이템이 없는 상태로 세이브를 읽게 되므로 실제 플레이 세이브에 바로 적용하지 않습니다. 게임을 종료하고 모드를 비활성화한 뒤 백업한 별도 테스트 월드로 비교하세요.
[image:contact]
[7. Workshop 공유 전 확인]
내부 ModName의 중복 여부, 안정판 버전, 제작 재료와 작업대 요구 사항, 원본 그림의 출처를 설명합니다. tModLoader의 Publish 기능은 실제 공개 업로드이므로 배포 ZIP과 README, 테스트 결과를 먼저 정리한 뒤 사용하세요. 이 공략은 제작 절차를 설명하며 독자 계정으로 자동 업로드하지 않습니다. 다른 사람의 게임 자산·아이템 모드를 수정해 공유할 때는 해당 제작자의 허가와 조건을 따릅니다.
[원본 문서와 확인 기준]
2026년 10월 7일 제작자·공식 도구 문서를 확인해 TroubleMaker 운영팀이 작성한 입문 공략입니다. 코드와 도식은 설명을 위한 자체 예제이며 이 서버에서 해당 게임의 실제 플레이를 검증한 결과는 아닙니다. 본문에 명시한 버전으로 별도 테스트 세이브에서 확인하고 배포하세요. 도구별 최신 버전·의존성은 아래 원본에서 대조합니다.
https://github.com/tModLoader/tModLoader/wiki/Basic-tModLoader-Modding-Guide
https://github.com/tModLoader/tModLoader/wiki/Basic-Prerequisites
https://github.com/tModLoader/tModLoader/tree/stable/ExampleMod
https://github.com/tModLoader/tModLoader/wiki/Localization
comments 0